 Hollowpine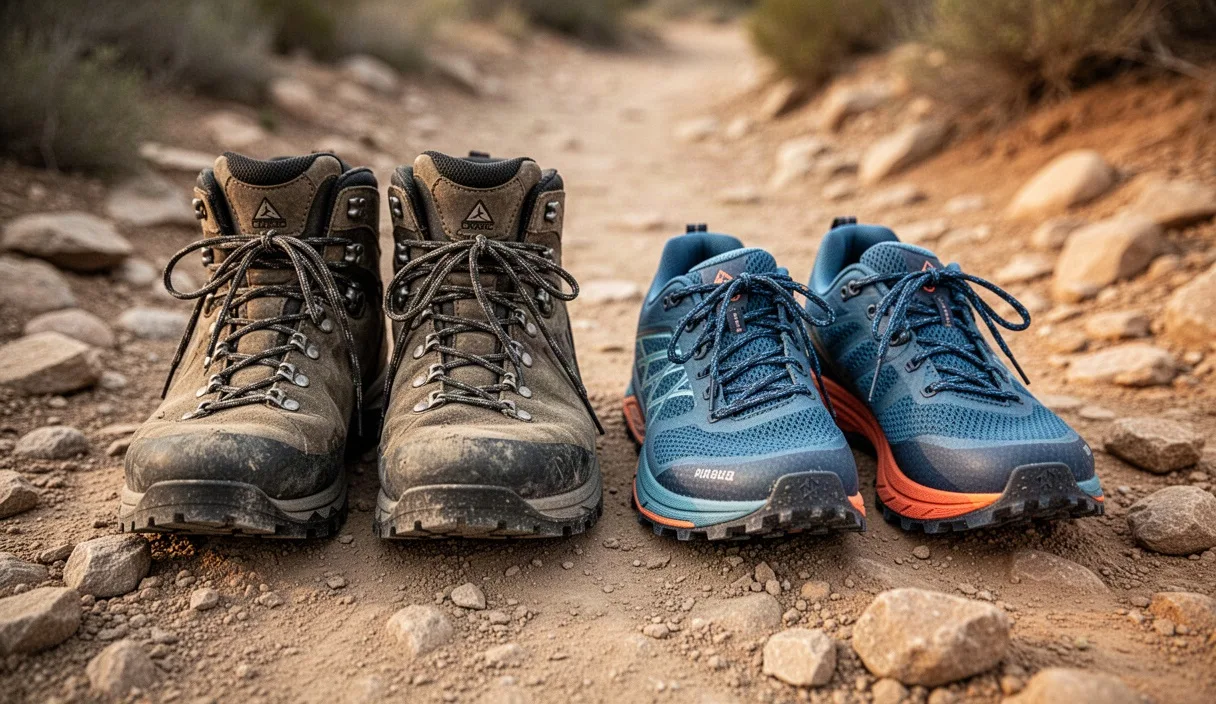
Every hiker eventually stands in a gear shop aisle staring at two walls of footwear, one lined with rigid leather boots and the other with mesh trail shoes that look barely different from road running shoes. The salesperson's answer is usually "it depends," which is true but unhelpful. This comparison breaks down what actually differs between the two categories, using measurable factors like weight, break-in time, and terrain performance rather than vague impressions.
Neither option is objectively better. Boots and trail shoes solve different problems, and the right choice depends on your typical pack weight, the terrain you cover, and how your ankles and feet respond to different kinds of stress over the course of a day. The sections below walk through each factor so you can match the shoe to the trip instead of the trend.
What Ankle Support Actually Does and Does Not Do
High-cut boots wrap around the ankle joint and, in theory, limit the side-to-side rolling motion that causes sprains. In practice, the support they provide is passive: the stiff cuff resists extreme motion but does little to prevent a moderate ankle roll on uneven rock or loose scree. A 2016 study in the Journal of Athletic Training found no statistically significant difference in ankle sprain rates between hikers wearing high-top versus low-top footwear on similar terrain, though the sample size was limited and more research would be needed to settle the question definitively.
What boots do reliably provide is proprioceptive feedback, a subtle pressure cue that tells your brain the ankle is nearing its range of motion. Some hikers find this cue helps them adjust their footing before a rolled ankle happens. Others find the same rigidity limits natural ankle flex on technical terrain, which can actually increase strain on the knee and hip as the body compensates.
Ankle strength built through years of trail shoe use often matters more than the boot's cuff. If you have a history of ankle instability or a previous sprain that has not fully healed, a physical therapist or sports medicine specialist can assess whether supportive footwear is appropriate for your specific joint mechanics, since this is not something a comparison article can diagnose.
Weight Differences and Their Effect on Fatigue
Weight is one of the few differences you can measure with a kitchen scale. A typical men's size 10 trail running shoe weighs between 10 and 12 ounces per shoe. A comparable mid-weight hiking boot in the same size runs 16 to 20 ounces per shoe, and a full-grain leather backpacking boot can exceed 24 ounces.
The often-cited rule of thumb, that one pound on the foot equals roughly five pounds on the back in terms of metabolic cost, comes from older military load-carriage research and has not been precisely replicated in civilian hiking studies, but the general direction holds: weight at the extremity costs more energy per step than the same weight carried on the torso, because the foot accelerates and decelerates with every stride.
Over an eight-hour day covering 12 miles, that difference in swing weight adds up. Hikers switching from boots to trail shoes for the first time on a multi-day trip often report noticeably less end-of-day leg fatigue, particularly in the shins and calves, though individual results vary based on pack weight and pace.
- Trail shoe average weight: 20 to 24 ounces per pair
- Mid-weight boot average weight: 32 to 40 ounces per pair
- Heavy backpacking boot average weight: 44 to 52 ounces per pair
Break-In Time and Blister Risk for Each Option
Trail shoes are typically built from mesh, synthetic overlays, and a foam midsole, all of which flex close to their final shape right out of the box. Most hikers can wear a new pair of trail shoes on a full-day hike with minimal break-in, though a short 3 to 4 mile walk first is still worth doing to check fit under load.
Leather boots are a different story. A full-grain leather boot can take 40 to 60 miles of walking, sometimes spread over several weeks, before the leather fully conforms to the shape of your foot. Skipping this process is the single most common cause of blisters on multi-day trips, since stiff, unbroken leather rubs against the heel and Achilles tendon with every step.
Synthetic and nubuck boots break in faster, often within 15 to 20 miles, because the materials have more give than full-grain leather. If you buy a leather boot two weeks before a trip, you are taking on real risk. A practical break-in schedule looks like this:
- Wear the boots around the house for two to three hours on day one to check for pressure points.
- Take a 2 to 3 mile walk on pavement or light trail within the first week.
- Increase to a 5 to 8 mile hike with a loaded pack the following week.
- Only commit to a multi-day trip once the boots have logged at least 30 miles without hot spots.
Terrain Types Where Boots Outperform Shoes
Boots earn their weight penalty on a few specific terrain types. Loose talus and scree fields, where the foot needs lateral rigidity to avoid rolling on shifting rock, favor a stiffer sole and higher cuff. The same applies to off-trail travel through brush and deadfall, where the boot's higher cut protects the ankle from scrapes and impacts that a low shoe leaves exposed.
Cold-weather and snow travel is another clear case. Insulated boots rated for sub-freezing temperatures, often built with a removable liner and a higher volume for thick socks, keep the foot warm in a way that no trail shoe can replicate. Mountaineering boots designed for crampon compatibility fall into this same category and are not interchangeable with trail footwear at all.
Heavy pack loads also shift the calculation. Once total pack weight, including food and water, exceeds roughly 35 to 40 pounds, the added ankle support and stiffer sole of a boot can reduce fatigue in the lower leg during long descents, since the boot's shank resists the flexing that a loaded pack forces onto the foot with every downhill step.
Terrain Types Where Trail Shoes Are the Better Call
Well-maintained trail systems with graded switchbacks and consistent footing are where trail shoes shine. Most national park day-hike trails and many long-distance thru-hiking routes like large sections of the Appalachian Trail fall into this category, which is part of why thru-hikers have shifted heavily toward trail shoes over the past 15 years.
Warm-weather hiking is another strong case for shoes. Mesh uppers breathe and dry far faster than leather, which matters on trips with stream crossings or humid conditions. A wet trail shoe can dry out in a few hours of walking; a wet leather boot can take a full day or longer, and staying in soaked boots increases blister and skin maceration risk.
Trail running and fast-hiking styles, where pace and low weight matter more than ankle rigidity, are essentially built around trail shoes. Ultralight backpackers carrying base weights under 20 pounds frequently pair trail shoes with lightweight gaiters instead of boots, trading ankle protection for speed and reduced fatigue.
Waterproofing Tradeoffs Worth Knowing
Waterproof membranes like Gore-Tex keep water out, but they also trap moisture in. On a hot day, feet sweat inside a waterproof shoe or boot with nowhere for that moisture to escape, which can leave socks damp even without any external water exposure. Non-waterproof mesh trail shoes let that moisture out but also let water in during creek crossings or wet grass.
The practical tradeoff comes down to how you handle wet feet. Waterproof footwear works well for cold, wet conditions where staying dry matters more than breathability, such as a rainy fall hike in the Pacific Northwest. Non-waterproof shoes work better for trips with frequent water crossings, since wet feet in a quick-drying mesh shoe dry out faster than wet feet trapped inside a waterproof membrane.
| Condition | Better choice | Reason |
|---|---|---|
| Cold rain, few stream crossings | Waterproof boot | Keeps feet dry and warm longer |
| Frequent creek crossings | Non-waterproof trail shoe | Dries faster once wet |
| Hot, dry summer trail | Non-waterproof trail shoe | Better breathability, less sweat buildup |
| Snow or freezing temps | Insulated waterproof boot | Retains warmth, blocks moisture |
How to Decide Based on Your Typical Trip
Start by looking at your last five hikes rather than the one big trip you are planning. If most of your hiking is on maintained day-hike trails under 15 miles with a light pack, trail shoes will likely serve you better in terms of fatigue and comfort. If your typical outing involves a loaded overnight pack, off-trail sections, or scree fields, the added support and durability of a boot is probably worth the weight.
Consider owning both if your hiking varies significantly by season or trip type. Many experienced hikers keep a pair of trail shoes for summer day hikes and a mid-weight boot for shoulder-season backpacking trips, switching based on forecast and terrain rather than habit.
Common mistakes
The most frequent error is buying boots a half-size too small to "feel supportive," which compresses toes on descents and causes black toenails on long downhill sections. A second common mistake is skipping the break-in period on leather boots before a trip longer than a day. A third is assuming waterproofing is always better, when in hot conditions it can trap sweat and make feet wetter than a non-waterproof shoe would.
Next steps
Try on both a trail shoe and a boot in the same brand and size at a store with a return policy, and walk on any incline or ramp available to feel how each handles descent. Log your next three to five hikes with notes on terrain, pack weight, and how your feet and ankles felt afterward, then match that data against the terrain guidance above before your next gear purchase.